
The Ultimate Guide to Checking Your Car’s Oil
- Leah Bryant

- Jul 1, 2025
- 3 min read
Updated: Aug 8, 2025
Keep Your Engine Healthy in Just 5 Minutes
Your car’s engine is a complex machine, but keeping it healthy doesn’t always require a mechanic. One of the simplest, most important tasks you can do at home is checking your oil. This quick habit could save you thousands of dollars and extend the life of your vehicle.
At TechNation, we believe that empowered drivers are safer drivers. Whether you're a weekend warrior, daily commuter, or first-time car owner—this guide walks you through everything you need to know about checking your oil.
🧰 Why Engine Oil Matters
Engine oil plays three major roles:
Lubricates the moving parts inside your engine
Cools the system by reducing friction
Cleans and traps debris to keep the engine running efficiently
Without enough oil—or if the oil is dirty—your engine could overheat, wear out faster, or seize entirely. The good news? A quick dipstick check can prevent all of that.
🕐 When Should You Check Your Oil?
We recommend checking your oil once a month or:
Before any long road trip
After driving in extremely hot or cold weather
If your engine starts making unusual noises
When your oil pressure warning light appears
Even if your car seems to be running fine, don’t wait for a problem to pop up. Think of this as a regular health check-up for your vehicle.
🛠️ How to Check Your Oil in 5 Easy Steps
Step 1: Park and Cool
Make sure your vehicle is parked on level ground, and the engine has been off for at least 10 minutes. You want the oil to settle for an accurate reading.
![Photo: A car parked on flat driveway with the hood popped open]Caption: Always check your oil with a cool engine on flat ground.
Step 2: Locate the Dipstick
Open the hood and look for the oil dipstick—usually a yellow or orange handle. It might be labeled “OIL.”
Step 3: Pull, Wipe, Reinsert
Pull out the dipstick and wipe it clean with a paper towel or rag. Then, insert it all the way back into the tube and pull it out again.
Step 4: Read the Level
You’ll see two markings—usually “MIN” and “MAX.” The oil should fall between them.If it’s low, you’ll need to add oil. If it’s too high, it could cause pressure problems.
![Photo: Close-up of a dipstick showing oil level between MIN and MAX]Caption: Your oil level should always fall within the recommended range.
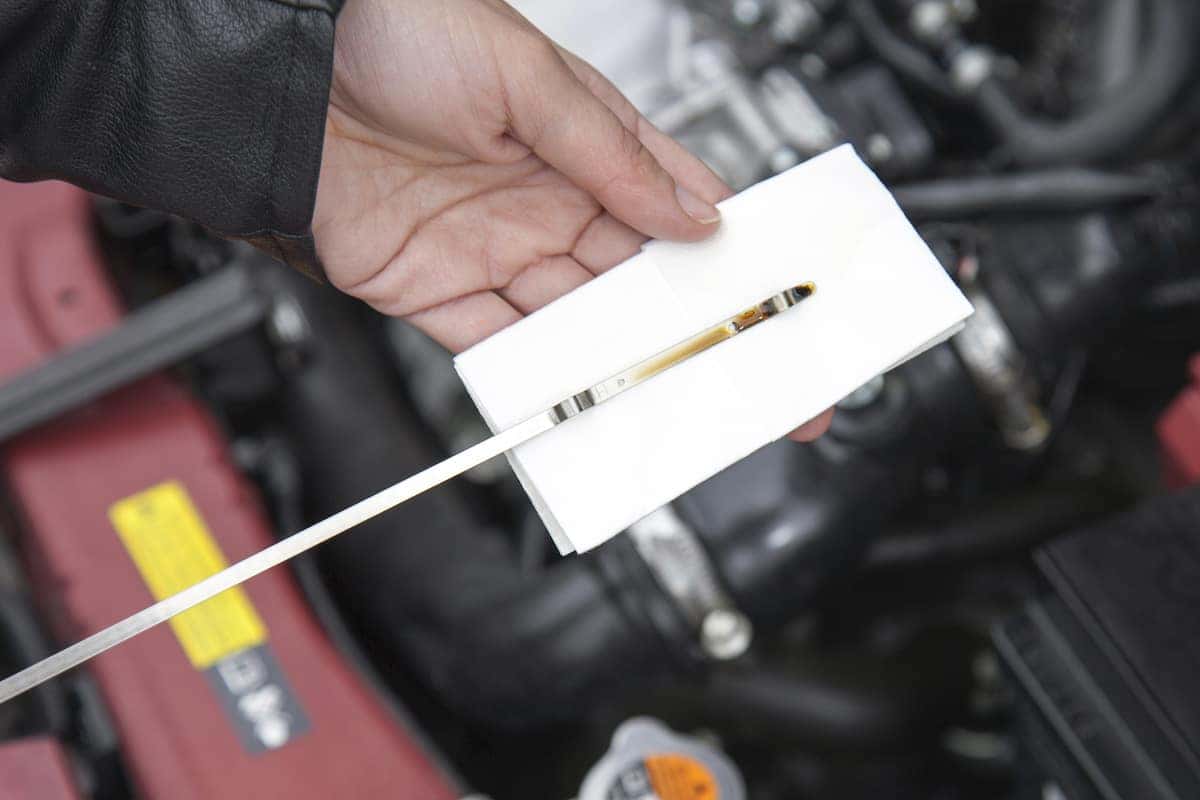
Step 5: Check the Oil’s Condition
Healthy oil is smooth, amber, or light brown. If it looks dark, gritty, or smells burnt, it’s time for an oil change.
🚨 Signs You May Be Low on Oil
If you notice any of these warning signs, check your oil immediately:
Knocking or ticking sounds from the engine
Oil warning light on your dashboard
Engine running hot or overheating
Smell of burning oil
Poor performance or rough idling
🧪 What If the Oil is Dirty or Low?
If your oil is:
Low: Add the recommended type of oil slowly, checking as you go.
Dirty: Schedule an oil change. Dirty oil loses its lubricating properties and can damage the engine.
Pro Tip: Always keep an extra quart of oil in your trunk—just in case.
✅ Quick Checklist
✅ Check once a month
✅ Use a clean rag
✅ Park on flat ground
✅ Let engine cool first
✅ Reinsert dipstick fully
✅ Watch for warning signs
🔧 Let TechNation Help
Not sure which oil your vehicle needs? Engine light on? Schedule a quick diagnostic with TechNation, and we’ll get your car road-ready in no time.

Want more tips like this? Subscribe to the TechNation Torque Newsletter for monthly maintenance tips, exclusive coupons, and reminders tailored to your vehicle's needs.


Great info!! Thanks. You guys rock. I used Technation a few times when I lived in Houston area and they were great. Highly recommend!